Written & Edited by Bessey
GIMP, https://www.gimp.org is free, photo editing and image manipulation software, with many tools and features to enable the creation of unique masterpieces.
Here is a simple guide of the absolute basic instructions you need to take an image and produce a new work of art from it.
Go to File, Open, choose a picture.
You can access the tools along the top of the screen, or by right clicking on the image.
If you need to change the size of the loaded image: Image, Scale Image, adjust the numbers. The chain next to the boxes- if it is closed, the width will automatically adjust when you alter the height to keep the same aspect ratio.
The boxes on the left of the screen record each change you make. You can click on any of these to go back to that point in your editing, and start again from there. You can also use Ctrl+Z to undo the last action. Ctrl+Y will redo. If the boxes are absent you can find the option in Windows, Dockable Dialogs, Undo History.
The icons top left include a magnifying glass. Use this to zoom in. Activate it, then click on the image where you want to zoom as many times as required. In View, Zoom, you have other zoom options including Fit Image in Window, which will return you to full image. Also use Shift, Ctrl + J to return to full image. Also here is Revert Zoom this is useful when you have zoomed perfectly into an image to edit, then accidentally gone one zoom too many.
To remove a background from your image, click on Layer, Transparency, Add Alpha Channel. This will add an unseen transparent layer behind the pixels of your image. Click on the eraser icon, top left.
The box on the right of the screen is where you can manipulate the tools. With regards to the eraser. If absent, select Windows, Dockable Dialogs, Tool Options.
Size-1 being 1 pixel, you select how large an area your eraser will remove to transparency.
Hardness & Force-click on the slide bar and drag it right to maximise these (to 100) to give the most definite erasing tool. The vertical scrollbar; pull down to reveal Anti Erase. Click this if you need to restore any part of the erased image back to its original. Click it again to turn it off and return to erasing.
Another option to erase, useful for removing background in sections: in top left tools is what looks like a wand, Fuzzy Select Tool. You can select this, then click on an area you want to remove which shares a color. A border will appear around the section. Ensure it doesn`t contain any part of the image you want to keep. Press Delete to remove to transparency all that is within the border.
If you find the eraser is not doing anything try Select, None.
To save the picture, File, Save As. By default it will save as .xcf. This is best left if you are continuing to use the image within your project with Gimp. You can use Export As also, where ,jpg and .png are among the options. These, for if you want to share the image elsewhere. .png is used to keep transparent areas as transparent. When you come back to work on the file it will be visible in the Gimp File, Open, Recently Used.
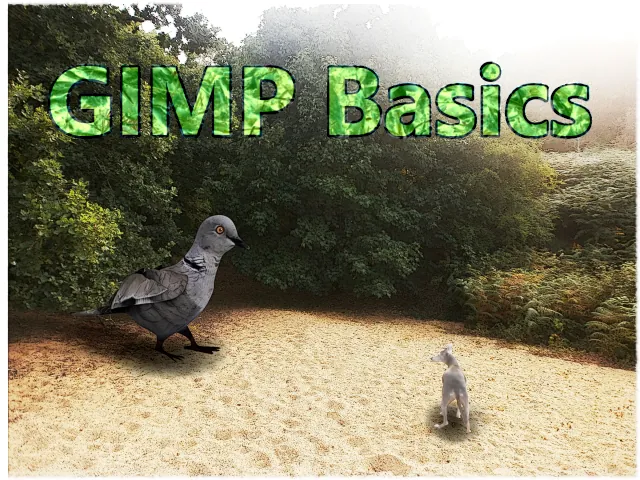
The image with the background removed, which you have just saved, leave this for now. Now you can bring in another image to use as a new background for the saved image. Load in your new image to work on using File, Open. If you still have the saved image loaded as well you can select between images in the boxes above the work-screen. You can simply select a single color for your new background using the bucket icon, Bucket Fill Tool. Select this. Click on the left of the two boxes under the tool icons to open up the color selections. Change Foreground Color. The right of the two boxes can be manipulated in the same way, Change Background Color and erasing will then produce the color you choose for that.
To resize layers: for when you simply want to match the layer sizes. First check out the sizes of your images. Click on the image boxes at the top of the screen, one at a time. Use Tools, Transform Tools, Scale. The sizes will be shown here. Adjust the numbers so they are the same for both images, You may need to click the chain icon, (to complete the link) next to the numbers to make the height and widths the same for both/all layers. Click Scale. Chances are you will not see the full image. Here you need to adjust the canvas size for the layer. Image, Fit Canvas to Layers. Save all images when completed.
Now to join the parts together. Select the background image, if it is already on screen, ensure it is the image in the main window, or load it in with File, Open. Next load in the image to appear on this background, File, Open As Layers, probably in Recently Used, or wherever else it is saved to. You can use Tools, Transform Tools: Move (then use your keyboard arrow keys to put it in place), or Scale. (You can click on the image and adjust it`s size manually with handles around the image outline by clicking on the small box/arrow/big box tool icon, Scale Tool, then clicking on the part of the image to scale). You can use the Eraser Tool to erase any of the foreground image to show the image behind.When you are satisfied with the overall look, Image, Merge Visible Layers and save it.
You can add smaller aspects from other images in the same way, to add further details.
Other useful tools: Paintbrush Tool, so you can draw on your image. This opens a box on the right which is similar to that for the eraser tool. There are several brush heads pre-programmed for you to select from. Change the color by clicking on the left of the two boxes under the tool icons. You can use the Color Picker Tool to color match an existing color to paint with that color. Zoom in if necessary, then click on the tool, click on the color you want to draw with. Remember to click back to the Paintbrush icon after you`ve selected.
Use Text tool to write on your image. Type your words, then click & hold left mouse button along the letters you have created to be able to use the box that has appeared alongside to change font size & color. To position it use Tools, Transform Tools, Move and your keyboard arrow keys.
Dodge/Burn Tool is useful for lightening and darkening areas of your image. The brush size can be adjusted. The more times you draw over the same area, the more light or dark the area will become. When you click on the tool icon, there will be a vertical scroll bar appear on the right. Scrolling down will allow you to choose between Dodge (lightening) and Burn (shadowing).
You can mess about with the whole picture: Select, All, then use Colors, for example: Brightness-Contrast. Also Filters can be used.
Experiment! Enjoy! Create that masterpiece!


