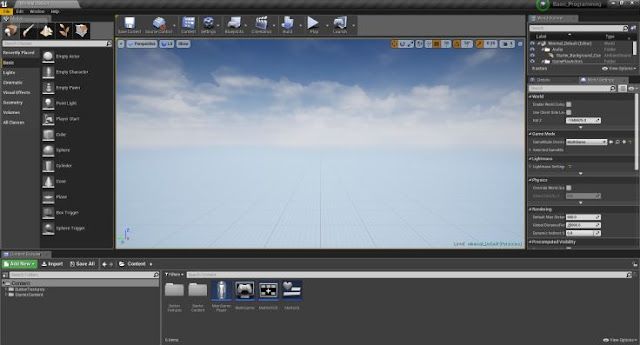
Setting up the Project
‘Blank’ project template was opened. When it opened, four entities were created in the Content folder: a Player Character, ‘MainGamePlayer’; a GameMode Base, ‘MathGame’; a new HUD class, ‘Maths HUD’; and a Widget Blueprint, ‘MathsUI’.
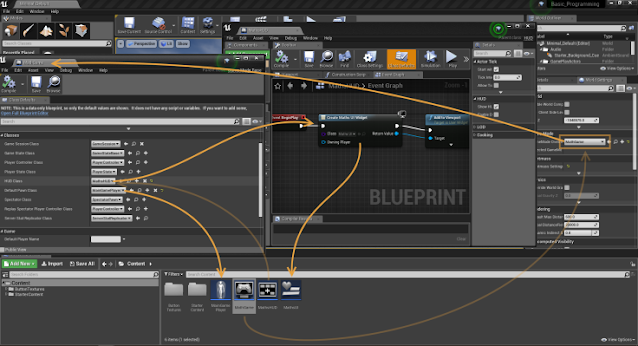
The project’s GameMode Override was set to ‘MathGame’. This allows us to tell the project what other settings are to be used for the defaults by setting them in the GameMode — setting the HUD Class was set to the ‘Maths HUD’ and the Default Pawn Class was set to the ‘MainGamePlayer’.
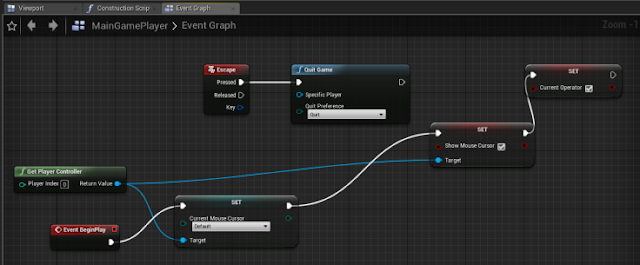
This means the project knows what Player Character is and the HUD Class it is to use; and the HUD class is used to tell the project to “Event BeginPlay, Create Maths UI Widget and Add it to Viewport”.
The Player Character does very little, compared with the amount of programming to be put into the Maths UI widget. All it does is hold the information telling the project to “show mouse cursor” when the project starts, and to end if the player presses ‘Escape’.
Now it came down to designing the User Interface, and then programming the functionality of the calculator. This was all designed in the widget blueprint ‘Maths UI’.
User Interface
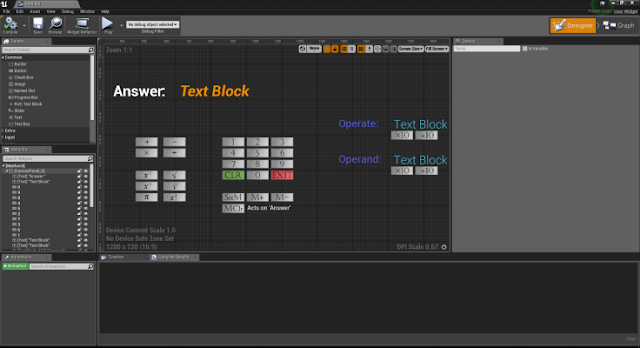
The UI of the calculator was created with a variety of text boxes — some with set pieces of text, such as ‘answer’ and ‘operate’; and others with text binds, which would change depending on the values selected by the user (the ones which simply say ‘Text Box’ have text binds).
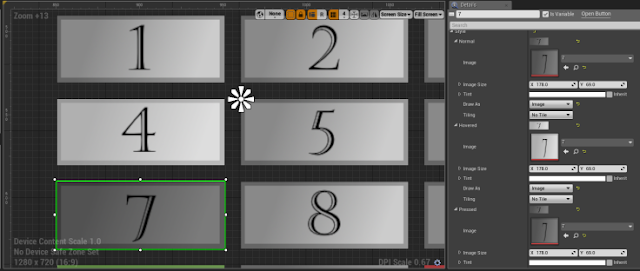
The buttons were all created on Photoshop. Three versions of every button were created – the default button, with a smart, grey background and clean font; a lighter version which displays when the button is ‘hovered’ over to give it a sense of depth, and a darker version which displays when the button is pressed.
Basics
The most basic function of a calculator is to be able to add, subtract, times and divide numbers. However, before this can be done, there must be a system in place that allows the user to change the value of the operate and operand; the setup of this functionality is the foundation for all other mechanics the calculator may be programmed to do. Three variables were created: one called ‘Operate’, one called ‘Operand’ and a third called ‘Answer’. The value of these float variables are what the text binds of the three blank text boxes are linked to.
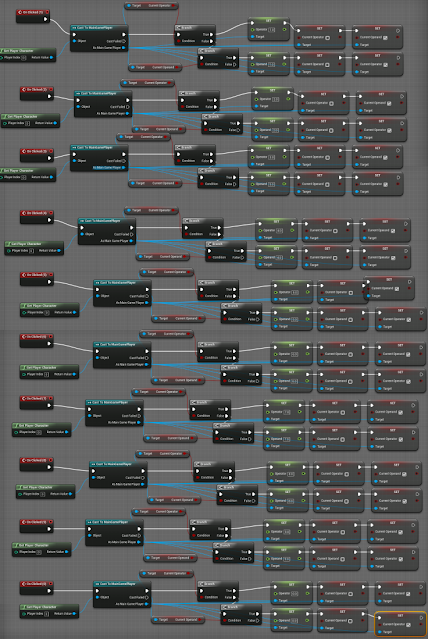
For setting the values of the buttons ‘zero’ to ‘nine’, the buttons were selected and given an ‘OnClick’ command. This created a starting point for the execution event — one starting point for every value from zero to nine. Every one of these then cast to the MainGamePlayer and Gets the PlayerCharacter (as it is this which is controlling it).
It is then set to follow to a pair of conditional Branches, which checks to see if the number should be setting the ‘Operate’ or the ‘Operand’. If it is the Operate to be set, it sets the Operate to the value of the key selected, and then switches to selecting the Operand on the next selection.
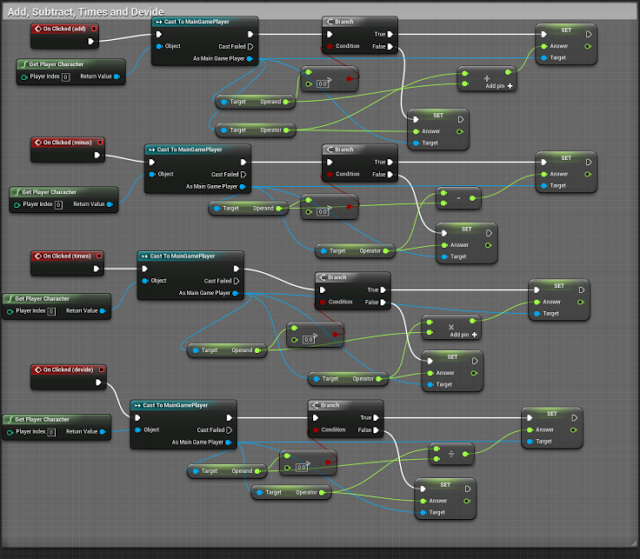
Manipulating these values with multiplication, division, addition and subtraction was then programmed. These followed similar steps to the code above, with the initial few nodes of Clicking and Casting then changed.
Adding and subtracting was performed by first checking to make sure the Operand was greater than zero. If it was not, the Answer was set to the Operate, as whatever the Operand did it would have no effect on it. If it was true, the Operand was added/subtracted from the Operate. Multiply and divide work in much the same way. Upon thought, it has become apparent that the conditionals to check if the value is greater than 0 are unnecessary, and breaks certain mechanics, like multiply by zero. These will be removed from the final product.
More Advanced Functions
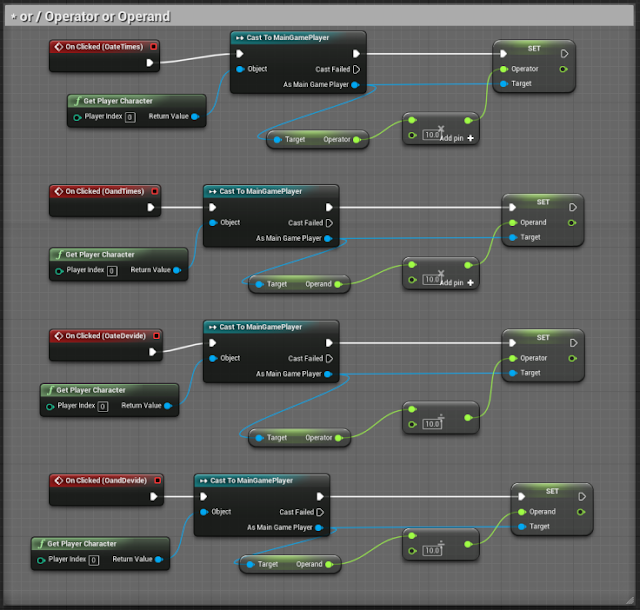
With the basic mathematics implemented, I wanted to import some more advanced features to add. As the current system does not allow for multiple-diet numbers (for example, 42), I wanted to add a system that allowed the current operator to be increased or decreased by powers of ten — allowing at least some level of compatibility with larger numbers. Alongside this, I wanted to add a Pi button, which would work using similar mechanics.
The powers of ten function was achieved by, as all before, linking the starting point of an execution event to its pertinent button, and casting it to the Character. The Operator/Operand is then SET to its original value ‘multiplied’ or ‘divided’ by 10.
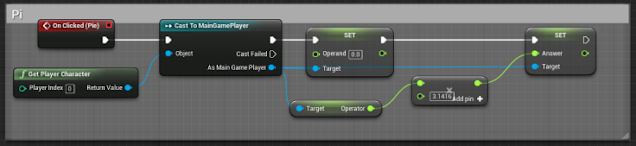
‘Pi’ was programmed using a very similar system with a few key differences. Because the Operand had no function in this, it is SET to zero, to make it clear to the user the Pi button acts on the Operator instead. The Answer is then SET to the current Operator, multiplied by Pi to five significant figures (3.1416).
Memory and Wiping
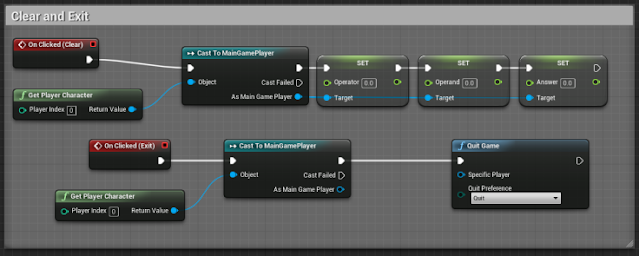
To prevent the user needing to close and open the application for every sum, I wanted to program in a button which would ‘Clear’ all variables. This was very simple to do — simply SET-ing the ‘Operator’, ‘Operand’ and ‘Answer’ variable to zero. I also wanted to program an ‘exit’ button; this, again, was very simple, requiring only a ‘Quit Game’ node to be added.
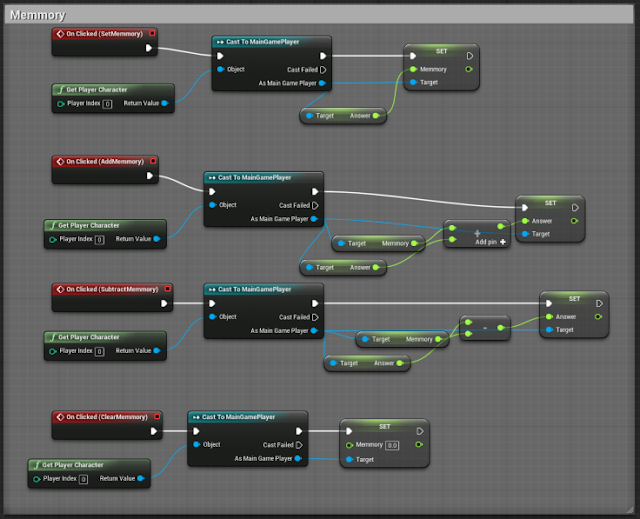
I also wanted to add a Memory function which could be sustained through the ‘clear’ function. A third float variable, ‘Memory’, was created, alongside four new buttons. The ‘SetMemory’ button would SET the Memory to the value of the Answer variable. AddMemory and SubtractMemory would add or minus the Memory value from the current Answer and SET it to the new ‘Answer’.
Lastly, the ClearMemory button was created, which SETs the variable to ‘zero’, thus nullifying the effects of either adding or subtracting the Memory from the Answer.
Factorial
My final desire for this calculator was that it would have a ‘factorial’ function programmed into it. A factorial can be defined as “the product of an integer multiplied to all the integers below.”
Please see this Factorial Maths document for how the equation ‘?! = ?(? − ?),’ was created.
Implementing this programming into Unreal was the most difficult piece of programming, but was still significantly easier thanks to the equation worked out above. Below is the final equation that was worked out:
As with all the others, it is triggered by the user clicking on the Factorial button. It then sets the Operand to zero, as this is not a part the factorial equation, before then checking to make sure the Operator is not already less than one. If it is less than one, it is too small to be factorized by this system, and so SETs the Answer as being that now.
If the Operator is larger than one, the equation can start in earnest, and so, the first step is to set the algebraic variables as presented in the Factorial Maths document. Since the Operator is not going to be changed by any element in the programming, this can act as the ‘initial value’ defined by ‘z‘. The variable ‘x‘ is set to be the same value as the Operator, and the variable ‘y‘ is set to its starting value +1, while y‘s starting value is zero. Having it set to ‘y+1′ is because this is the first iteration.
An Append showing the values of x and y is then Printed for testing purposes, but with x, y and z set up, the rest of the formula can continue. Because the equation follows that ?! = ?(? − ?), the first programmed step of SET-ing ‘x‘ is to find ‘Operator’, representing z, minus y (this is z – y, the brackets are implied because the next stage of the calculation comes after this one, and is dependent on knowing this value). This value is then multiplied to ‘x’, which then becomes the new value of ‘x’.
Then to check for the conditional sub-formula presented in the document, that “If ‘z – y ≤ 1‘ is false, +1 to y and loop. If true, end equation.” This is created with a conditional ‘If’ Branch, which uses the conditional ‘If’ of ‘Operator minus Y is ≤ 1’.
If this is found to be false, the equation Prints the current number of iterations (represented by y) and then loops back to the point just before the value of y was added by ‘one’. y is then SET to y + 1, because a new iteration has started, and the equation continues; looping until z – y ≤ 1 becomes true.
Whenever the z – y ≤ 1 conditional is ‘true’, it sets x to the Answer and then resets y to zero, resetting the ‘!’ function for repeated use, so that it can return to ‘+1’ on the first iteration of the next instance of its use.
This sums up everything the Factorial equation does, but for a more visual (though less well written) demonstration of how the programming works, see Factorial – programming close-up.
Summary
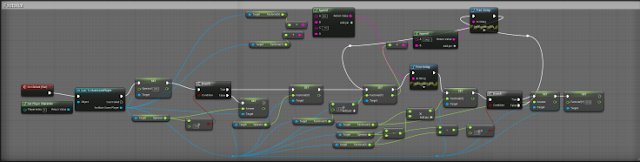
This is all the coding now present in the UI. There are a few other pieces of code which are used to bind the specific pieces of text (the variables) to the text boxes on the UI, but these have already been mentioned on a prior page.

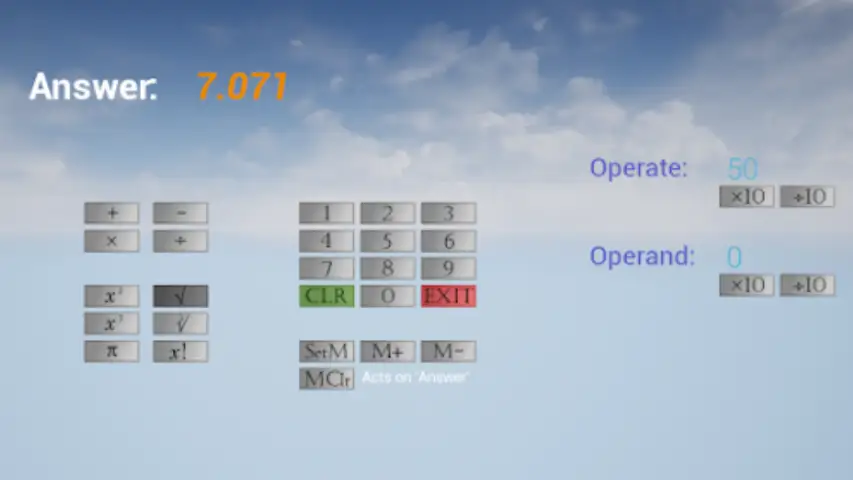
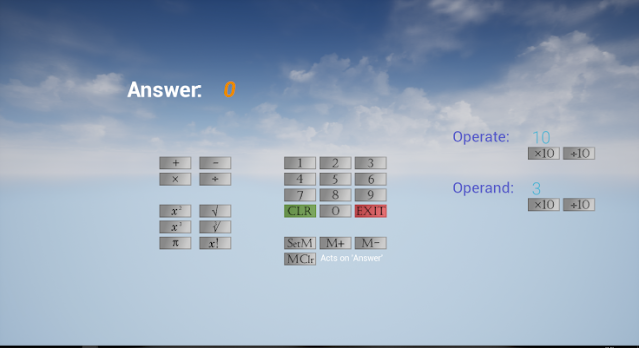
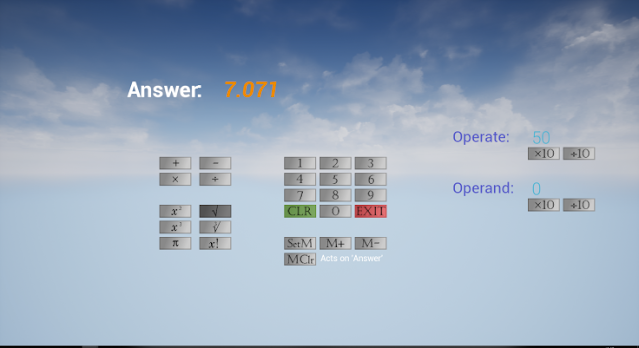
This is the calculator in use. The first thing done was the clicking of the ‘1’ key. This set the Operate to ‘one’ and then swapped the target of the button to the Operand. The ‘3’ key was then pressed, setting the Operand to ‘three’. I then used the ‘x10’ key below the Operate’s value to set it from ‘one’ to ‘ten’.
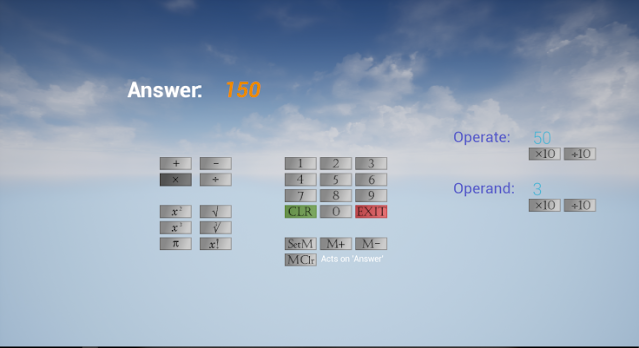
I did this again to create the value of ‘fifty’ for the operate, before pressing the ‘x’ button to multiply the Operate with the Operand (50 x 3), which then set and displayed the Answer as being ‘150’.
I then found the square root of the Answer with the ‘√’ key, which found the square root of the Operate, ‘fifty’, and gave the answer ‘7.071’.
The memory functions also work; as do all the other functions, barring the ‘cube root’ button, for reasons already mentioned.