Hello, and, again, welcome, for the first time, to the ‘Aperture Science Ingenuity Testing Vault Step-by-step Creation and Development Reference Manual Primary Installment One’.
We hope that your visual mastication of the following report is a pleasant one, and you are an excellent test subject.
Rest assured, the remainder of the blog will not be written in that tone of voice, as prolonged exposure to sarcasm is not an intended part of any test protocol, but is an unintended side-effect of the opening paragraphs.
One of the first steps made in the creation of this was to play ‘Portal’, looking at its design more objectively and more as a game designer rather than a player. From this, several things were noticed that could be used to create a more authentic feel. For example, the circular door was, rather than a cylinder cut into the wall, sunk a little into the ground.
I also noted down how big or small various items and materials should be, in relation to the standard ‘Unreal unit’ in Unreal editor, so they could be more directly implemented into the game environment — 20, in the below notes, is 100 Unreal units (so times by 5).
Setting Up the Blueprint
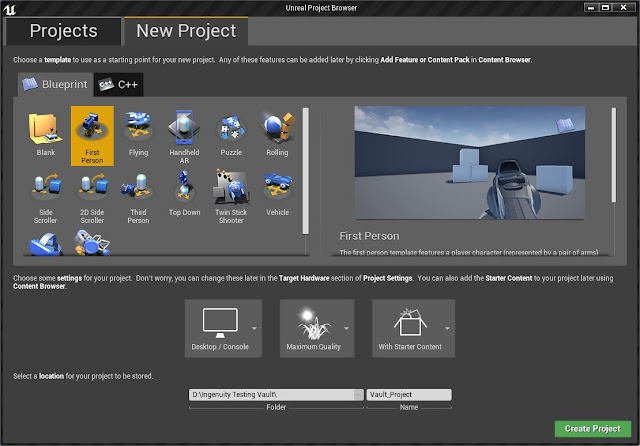
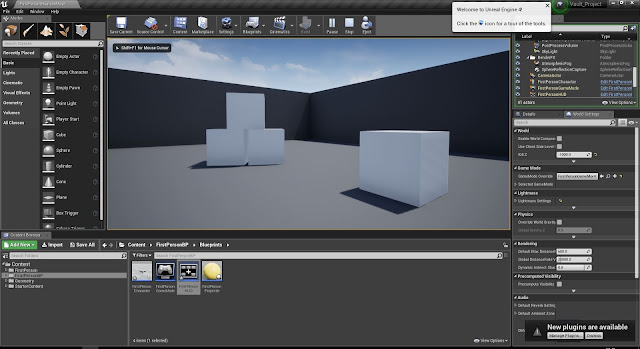
To start the creation of this level, the most similar default-blueprint was used: FirstPerson. This came with a pre-coded character with a gun and a small courtyard area with some physics-enabled boxes which could be shot at.
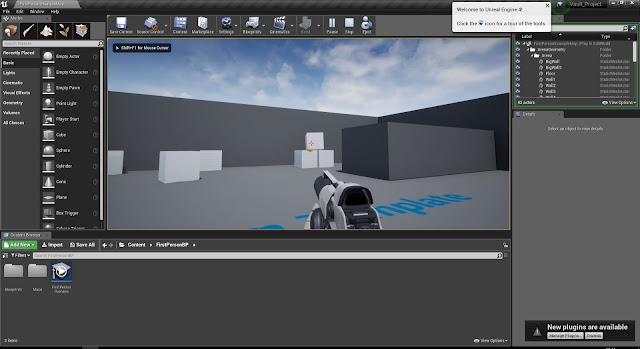
As seen here, in the editor, when the level is played, your camera is taken at the head height of the player. Left clicking fires the gun, the mouse turns the camera, the W, A, S and D keys move the player and there is a red crosshair in the centre of the screen.
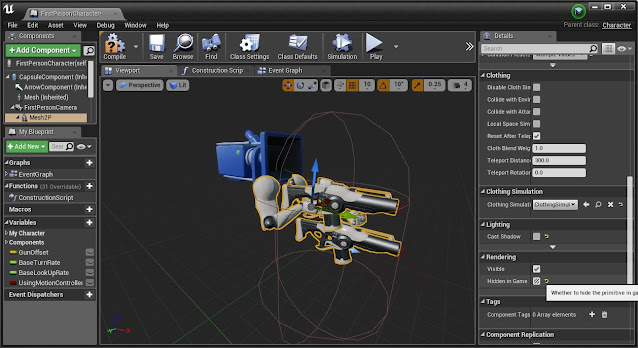
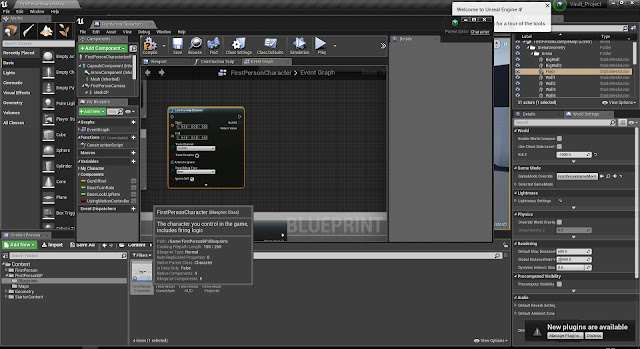
However, since this game is to be set before the events of Portal 1 (before the Portal Device has been attained) neither the gun nor crosshair was required. The ‘FirstPersonCharacter’ window editor was opened, thereto; the guns and arms selected and ‘Hidden in Game’ was ticked under the ‘Rendering’ sub-menu.
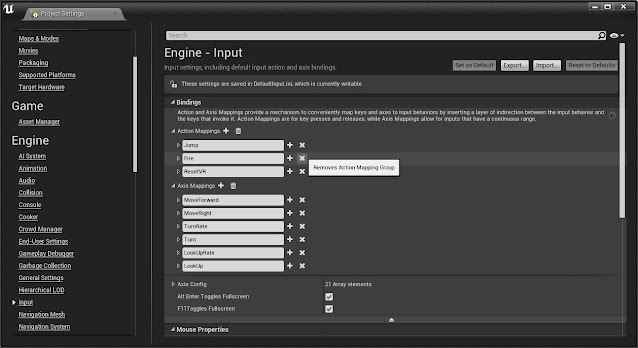
Then, under ‘Project Settings’ (accessed under ‘Edit > Project Settings’) of the menus at the top of the screen), the ‘Fire’ key bind was deleted under ‘Engine > Input > Action Mappings’.
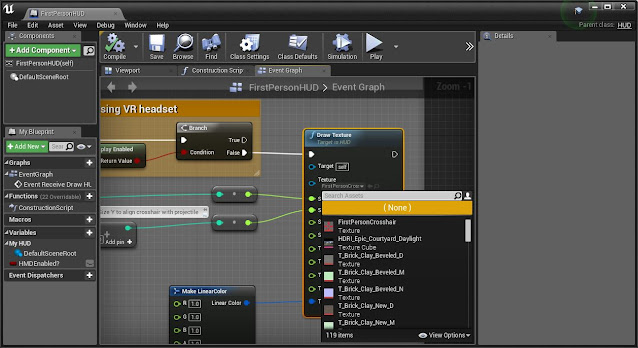
Lastly, the ‘FirstPersonHUD’ (HUD being Heads Up Display — the information rendered directly onto the screen when the game is in play) was opened and the chosen ‘Texture’ under ‘Draw Texture’ was set to ‘(None)’.
This had the desired effect. The image above, again, shows the level in-play. There is no longer a red crosshair in the centre of the screen, the gun no longer appears and clicking the fire button will no longer fire.
All that is kept are the key movements and directional mouse controls.
Creating LineTrace for Object Pickup/Drop
One of the most important mechanisms in the Portal game engine is the player’s ability to pick certain objects by way of pressing the ‘E’ key. This is important for almost all of the tests in the original game. I researched ways by which this might be done online, and performed as follows:
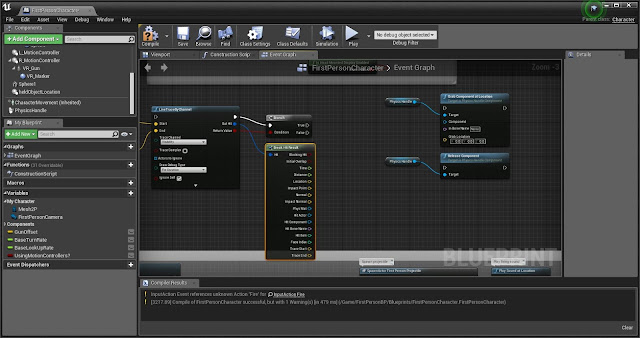
In the ‘Event Graph’ of the ‘FirstPersonCharacter’ blueprint, a ‘LineTraceByChannel’ was first created. This, once programmed, would create a line which (much like the laser sight of a gun) would fire from the PlayerCharacter outwards in the direction they were looking. This ‘Line’ would then ‘Trace’ along and act in accordance with what it meets.
Note: After completing the appropriate programming, et cetera, it was found that the method found online was either inefficient or was not completely applicable to this version of Unreal Engine (4.20.1).
The problem lay in the accuracy of the firing mechanism of the LineTrace. Originally, it was programmed to fire in the direction the player was looking, but it appeared as though this was affected by the angle of the subsequent wall.
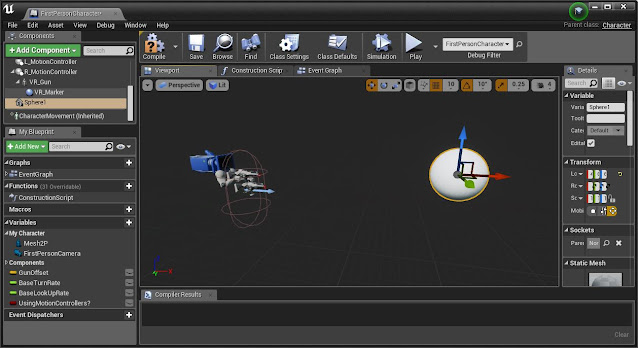
On the advice of my tutor, I created a ‘Sphere’ Component and positioned it, in the ‘Viewport’, to be directly upon the PlayerCharacter’s eyeline, but several feet away.
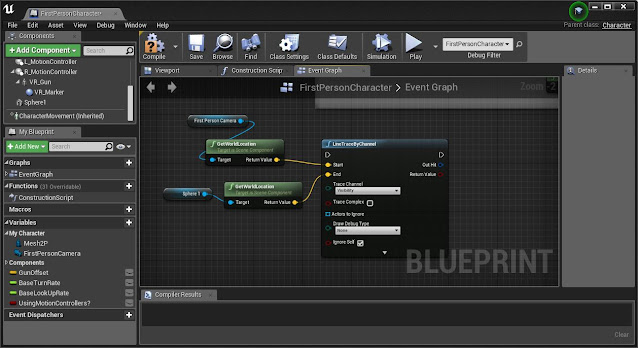
While the ‘GetWorldLocation’ of the ‘First Person Camera’ is still ‘Start’ of the LineTraceByChannel’, the ‘End’ of it is now the WorldLocation of the Sphere just created — allowing a more definite end point than was afforded in the prior method.
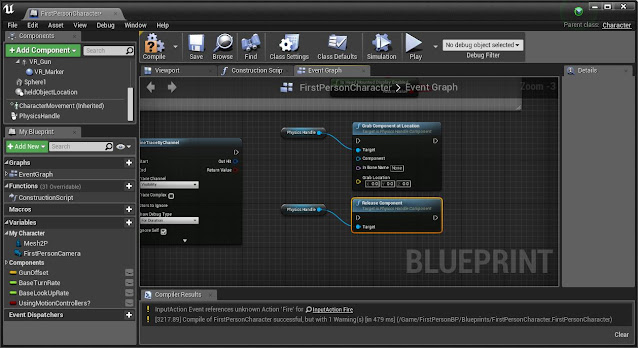
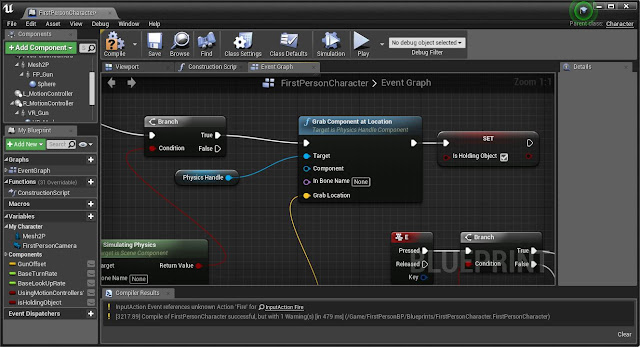
The main feature of this is to be able to pick up and drop objects. Helpfully, Unreal comes with a pre-created Node which performed these tasks: ‘Grab Component at Location’ and ‘Release Component’. The ‘Target’ of both these is the ‘Physics Handle’.
Returning to the (now correctly located) LineTrace, an ‘If Statement’ or ‘Branch’ was dragged out. The function of an ‘If Statement’ is to be able to say: ‘If’, when triggered, the Condition is found to be True, one thing will occur, or if False, another thing will.
The condition of this If is the ‘Return Value’ of the LineTrace. The Statement is also triggered by the firing of this LineTrace, meaning that, when the LineTrace is fired, the If Statement will check to see if the Line has come into contact with an applicable object. If so, ‘True’ will be followed; if not, then ‘False’.
It is only then the ‘Break Hit Result’ becomes important, as it breaks down the result of a LineTrace acting on a ‘Hit Component’.
The first thing is to test whether the Hit Component is applicable for being picked up. This will be determined by if it is Simulating Physics or not. An ‘Is Simulating Physics’ node is therefore added from the ‘Hit Component’ line, and is used as the condition of a second ‘Branch’ drawn from the ‘True’ condition of the previous ‘Branch’.
Thereby, if the Line Trace is found to come into contact with something, it will then ask if the object is simulating physics or not.
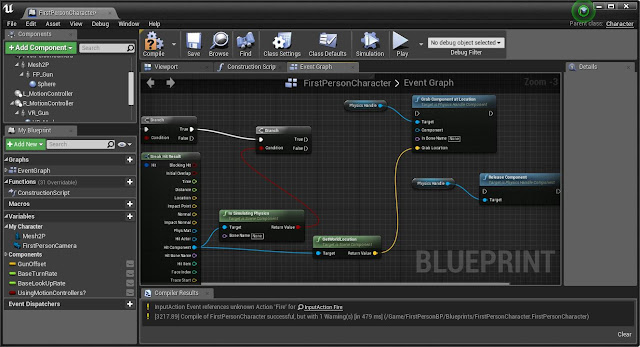
Here is the blueprint as it hitherto stands.
The start and end locations of the Line Trace have been set up, and so have the conditions, which have to be met, in order to ‘Grab Component at Location’ (i.e., to pick the object up). If these conditions are not met, nothing will happen, as there are no nodes connecting from either of the ‘False’ statements.
The ‘GetWorldLocation’ of the object is also used as the ‘Grab Location’ (the location it is grabbed from) for the ‘Grab Component at Location’.
Keybinding the LineTraceByChannel
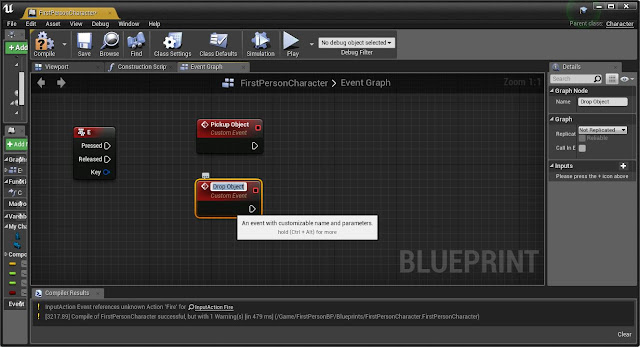
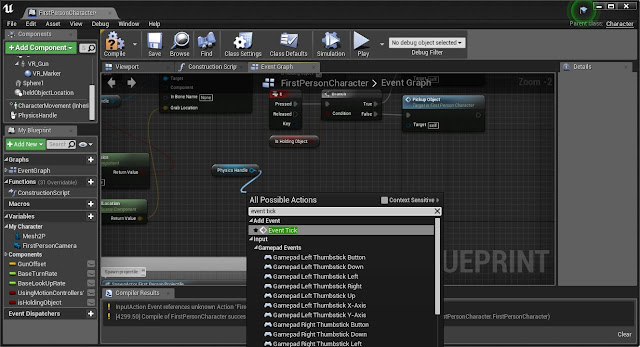
Still in the Event Graph of the ‘FirstPersonCharacter’, two ‘Custom Events’ were created: one to ‘Pickup Objects’; the other to ‘Drop Objects’. A reference to the ‘E’ key was also created, which is the key that will be used to trigger one or other of the new Events.
The ‘Drop Object’ was linked into the ‘Release Component’ created earlier, and the ‘Pickup Object’ was linked to the Line trace. Now, when the ‘Pickup Object’ event is triggered by pressing the ‘E’ key, it will fire off the LineTraceByChannel events.
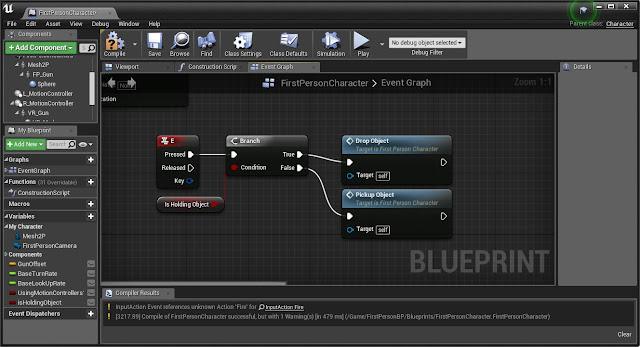
To make sure pressing ‘E’ triggers the correct one of the two New Events, another Branch was used. This time, the Condition of the Branch is a newly created variable, ‘isHoldingObject’.
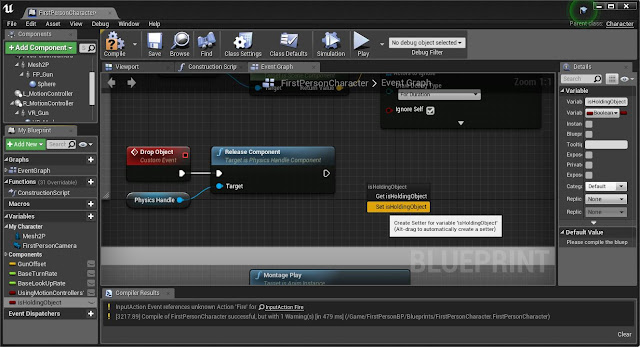
This variable currently does nothing, as there is nothing to say if it is or is not true, so, upon returning to the ‘Release Component’ event, a ‘Set’ reference to the isHoldingObject variable is created. This means that when the ‘Drop Object’ event is fired, it will set ‘isHoldingObject’ to ‘False’.
The same is done at ‘Grab Component’ at Location, but this time isHoldingObject is set to ‘True’ (as denoted by the tick beside it). Now, when ‘E’ is pressed, it will see if the LineTrace is in contact with an applicable object, and, if true, it will check to see whether ‘isHoldingObject’ is true or false. It will drop the currently held object if true, and will pick it up if false.
After this action, it will then set ‘isHoldingObject’ as True or False accordingly.
All that remains now is to ensure the object is being held at the correct location. To do this, a reference to the PhysicsHandle is drawn alongside an ‘Event Tick’ (the event tick being as of the ticking of the clock, meaning the event will fire sixty times a minute, (by default)).
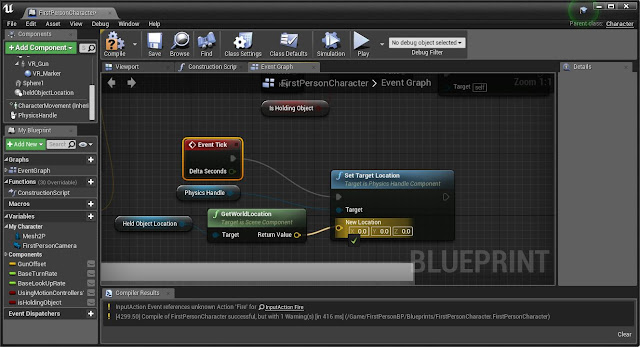
To set the location of the PhysicsHandle, a ‘Set Target Location’ node is used. The Target is the PhysicsHandle and it is told to ‘Set’ the ‘Target Location’, which is the WorldLocation of the HeldObjectLocation, on every ‘Event Tick’ (i.e. every second). ‘Held Object Location’ was created in a similar way to the Sphere earlier on: positioned on the PlayerCharacter’s viewport on the player’s eyeline a few feet away. This is where the object will be being held.
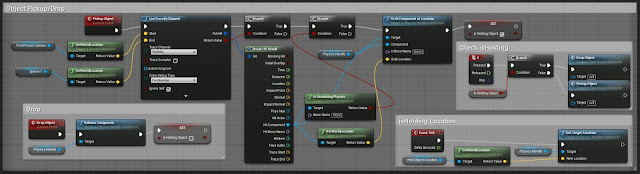
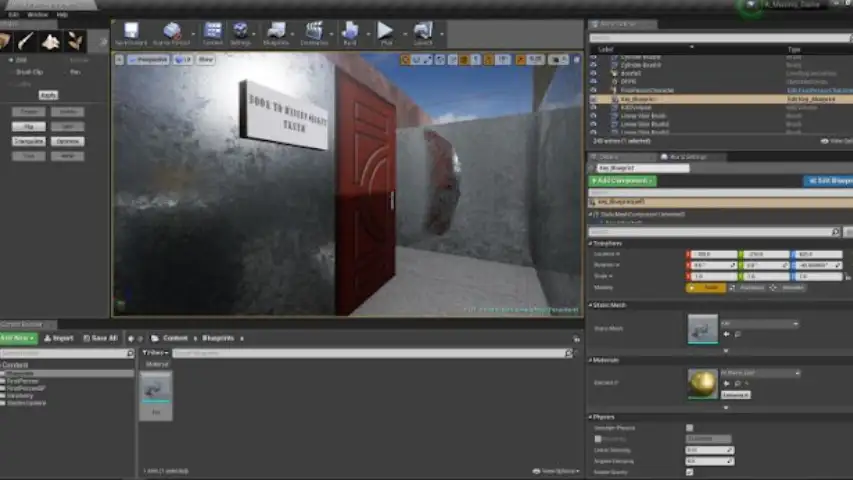
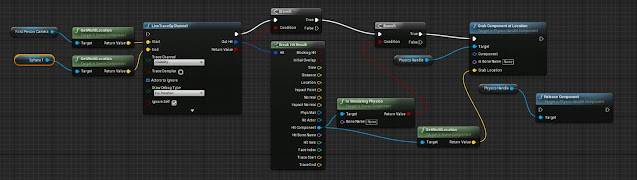
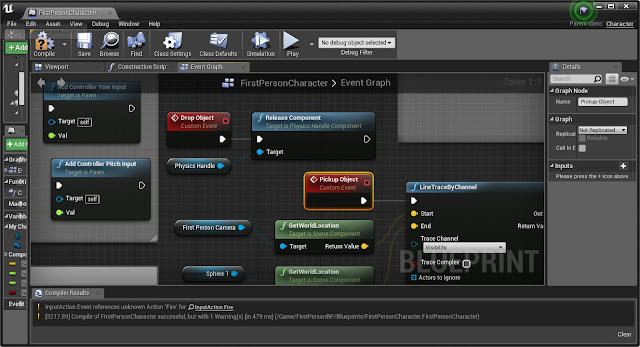
Here is the finished blueprint, for picking up and dropping objects, with all components. Additionally, to this is the Sphere, which is the ‘End’ location of the Line Trace, and the HeldObjectLocation which marks the WorldLocation the ‘Picked Up’ object is to be held at.
The ‘Hit Component’ of the LineTrace’s ‘Break Hit Result’ is connected to the ‘Component’ of the ‘Grab Component at Location’.
Now, as can be seen, pressing the ‘E’ key first causes the program to check if something is already being held, will drop it if there is, and will fire the ‘Pickup Object’ line trace if not (in accordance with the given locations). It will check if the Line Trace is in contact with an object which is ‘Simulating Physics’, and will ‘Grab’ the object and move it to the PhysicsHandle — setting ‘isHoldingObject’ to ‘True’ so the next press of ‘E’ will drop the object rather than pick it up.
Creating Textures, Materials and NormalMaps
In computer games, a Material is the thing which creates the texture (the color, shape, ‘look’ of the object in general). While the shape of the object itself will define whether it looks like a door or a key, it is the material which gives it color, makes it metallic, transparent, rusted and so on.
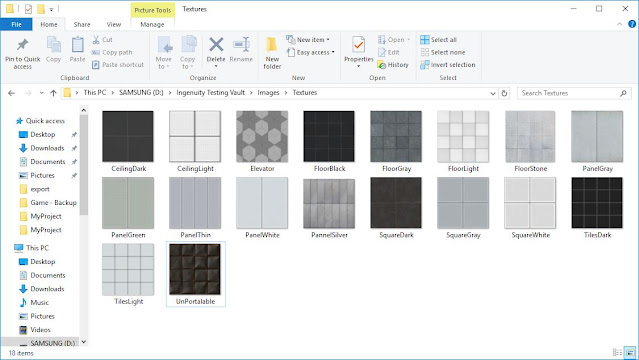
To create a Material, a Texture is needed. From searching online, I found textures from a variety of sources, which are, or resemble, textures used in Portal 1 or 2.
While these textures — which are nothing more than an image at this point — can be made into materials and put into the game immediately, it is possible to give the material the illusion of physical depth with the use of a piece of software.
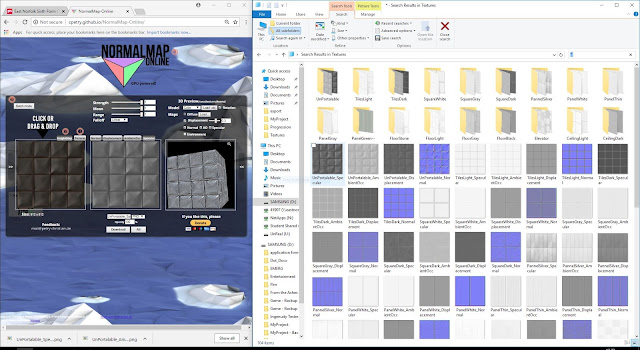
Normalmap Online is a free piece of software which can create Normal maps, Displacement, Ambient Occlusion and Specular maps from textures. These are each used for different functions, and together give the material much more depth than would otherwise be achieved with just the original texture.
After each of the Normal, AmbientOcc and Specular maps had been made from the base texture, they were uploaded into Unreal Editor. For ease of use, they had been clearly labelled and filed individually.
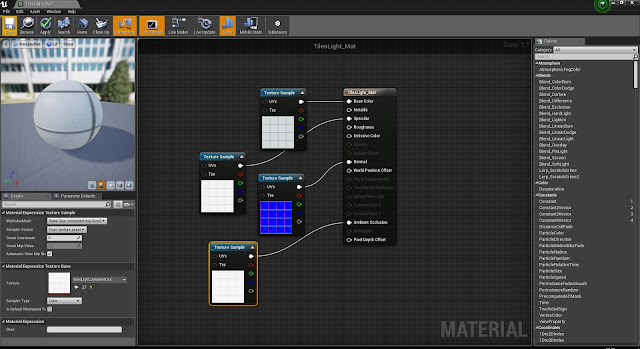
A material was created from the base texture by right clicking on it and selecting ‘create material’. This was then double-clicked on to open the ‘material instance’ blueprint above. The additional textures were then dragged in and fitted accordingly.
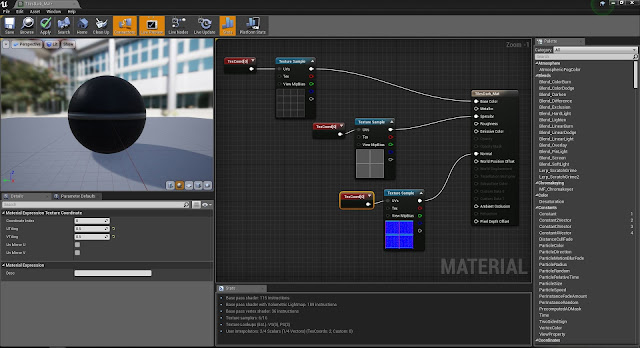
Not all of the materials lined up with the sizes of the notes (taken from the screenshots from the original games). They were too small or too large to fit into what the values assigned to them for Unreal required. To change this, a ‘Text Coord’ was created and linked to the ‘UV’s of the Base, Normal and Specular’ of the material. In the image above, three individual Text Coords were created. However, only one was really needed, linked into all three.
UTiling and VTiling were adjusted, changed from 1.0 to whatever value made them fit the required size. The texture was originally twice the size it should’ve been (comparing the size of the tiles with the size of the Unreal units), and so 1.0 was changed to 0.5, making it half the size so to fit correctly.
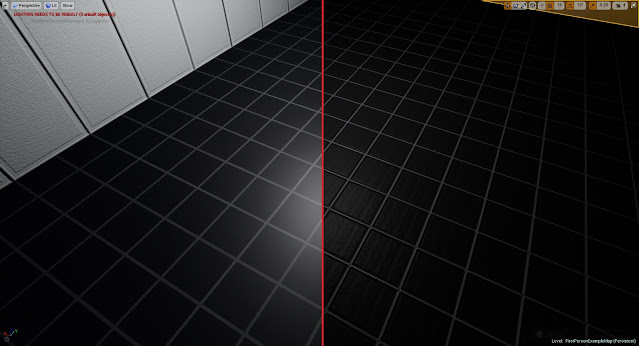
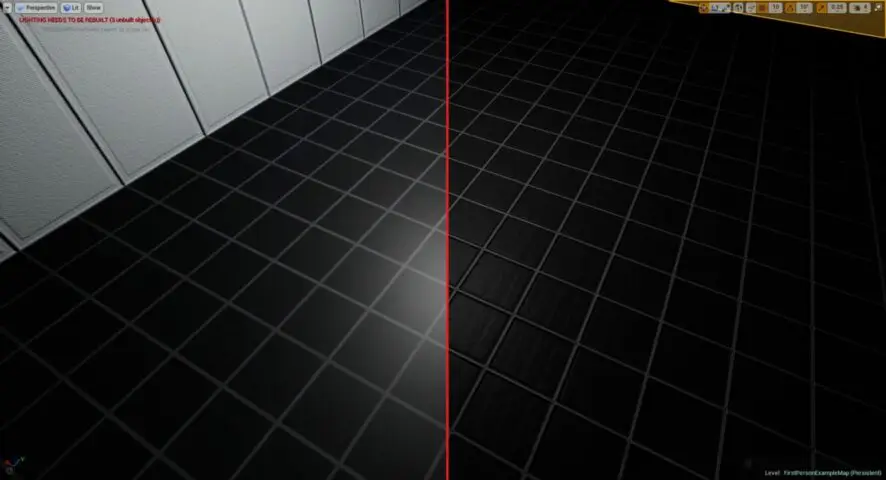
Here is an example of how much extra depth normal-mapping creates. Left is an example of just the base material; right is the material with all the added maps.
Each of these materials can now be dragged directly into the viewport and onto an object’s surface. The designing of the level was now ready to begin. View this in the Second Part of the ‘Aperture Science Ingenuity Testing Vault Step-by-step Creation and Development Reference Manual’.
So far, the creation of this likeness has gone well – the textures are all strongly reminiscent of Portal, the game mechanics of movement, jumping and picking up/dropping objects works well. The only issue is that the objects are prone to wild spinning, but, after adding ‘Angular Damping‘, they didn’t spin out of control, but only a little before stopping.
The measurements taken from the game will certainly be of help in making the game accurate to a ‘block-ish’ feel as in the original game, and will ensure the materials applied will always fit correctly and be of the right size.
Were I to do this again, I would take more care in the naming and sorting conventions of storing the materials to start with. These naming conventions were too complicated, initially, to be properly suitable, and had to be done again.